I had looked at one previously (i.e. several years ago, ok about 6 years) but what grabbed my attention now was the integrated LED lights ("Keep up Grandad" I hear a couple of voices say....). With one foul swoop I would divest myself of the two lamps at my desk, clearing clutter away ... albeit temporarily. I don't have a large space to build and paint at unlike some people... so anything that can do double duty is worthwhile.
So the day arrived and my booth was duly assembled, I powered it on and... .... .. the lights and the fan started up. What a racket!
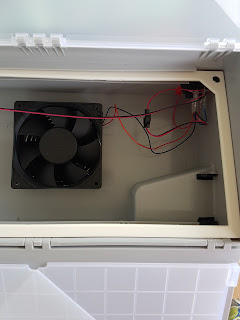
Upon investigation I found that it was not going to be a simple 'unplug the fan' as everything was wired so that I couldn't easily do this. Having done a grand total of zero years undertaking any electrical wiring (sure I can read a schematic... sortof... but when it comes to the practical, let's just say I'm a 'leave it to the professionals' type).
Determined to make use of this tool, I figured I needed at least one more switch, so with booth in hand I trundled off to my local Jaycar Electronics store. I was assisted by a very helpful store manager, and $2.50 later plus some entry-level wiring I now have a booth that has LEDs without the noise. When I need to use the fan I'll just push the button on the side of the box and voila!
 |
| Ready for drilling... |
 |
| What lies beneath |
 |
| My $2.50 saviour |
 |
| Wired like a pro <cough> |
 |
| All screwed back together. lights on! |
 |
| The final setup... in the right drawer of the desk is all the modelling stuff on a tray similar to the one in the booth, ready to be brought out into the vacant space between laptop and painting area |
Pretty excited to settle down this evening for some painting... I hope...
While I'm on the subject of painting, I bought a new portable photo booth with an LED strip off eBay, and I am pretty happy with the results. Look for less rubbish photos in the future!
 |
| With white background... |
 |
| With black background... |
Right, gotta go paint something!

No comments :
Post a Comment